bwh-b24-0010


Includes:


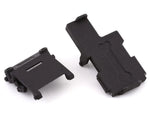
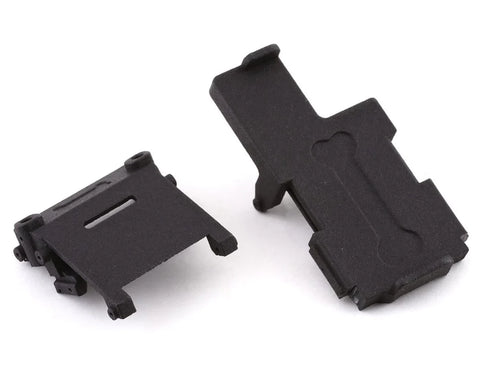
The BowHouse SCX24 Low CG Conversion Kit is a high performance upgrade for your SCX24. You can take your little dynamo to the next level with this low CG battery tray and ESC tray combo.
Features:
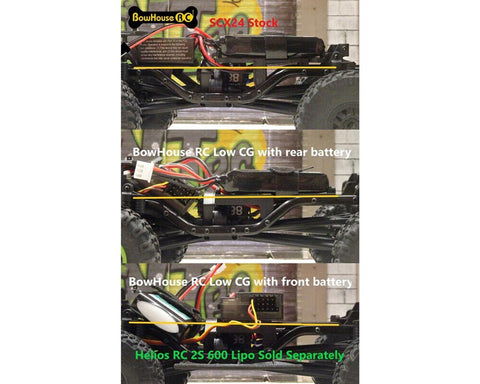
- Low CG battery tray drops the battery by 4mm down to the top of the rails
- Low CG ESC tray rotates and lowers the ESC below the rails
- ESC tray includes integrated shock mounts in 2 positions for compatibility with all SCX24 models
- Option to install battery on ESC tray and ESC on battery tray for maximum forward weight bias
- Reuses stock hardware for installation
Includes:
- (1) low CG battery tray
- (1) low CG ESC tray
INSTALLATION NOTES
- Battery tray:
- Remove the stock battery tray by removing all 4 screws holding it in place. Save screws for installation of BowHouse battery tray.
- Gently spread the chassis rails to remove the stock battery tray from the chassis.
- Remove the stock hook-and-loop strap from the stock battery tray and install on BowHouse RC battery tray.
- Before installing the BowHouse battery tray, start a screw into each screw hole in the BowHouse tray for 3-4 turns.
- Gently spread the chassis rails to insert the BowHouse battery tray in chassis. You may need to gently bend the upper motor lead down for better clearance.
- Insert all 4 screws to secure BowHouse battery tray to chassis.
- ESC mount:
- Remove the stock body mount(s) from the shock towers and save stock screws.
- Remove the stock ESC from the stock ESC mount carefully. If removed carefully, you can reuse the double stick tape on the bottom of ESC. If necessary, remove the original double-stick tape and replace with new tape, hot glue, or other adhesive.
- Unscrew upper ball studs securing front shocks to shock mounts.
- Remove 4 screws holding stock ESC tray in place.
- Before installing the BowHouse ESC mount, start a screw into each screw hole in the BowHouse mount for 3-4 turns.
- Gently spread chassis rails to remove stock ESC tray and insert BowHouse ESC tray into chassis.
- Install 4 screws holding ESC mount to chassis.
- Attach shock ball studs to shock mounts in the appropriate position. Note that shocks are mounted in front of body mount posts on certain models (e.g., Jeep Wrangler and C10 versions) and behind body posts on other models.
- Install ESC on ESC mount. For certain models (e.g., Betty and Jeep Wrangler), ESC should be rotated so that the servo wire plugs are on the drivers (left) side and the motor and battery plugs are located toward the front of the truck. On other models, the ESC can be installed with the servo wire plugs in front and the motor and battery plugs on the passenger side, similar to the stock configuration.
- If the ESC is mounted in the rotated position, BowHouse recommends running the servo lead through the space between the chassis rail and the BowHouse ESC mount on the drivers side.
- Install body mount(s) into BowHouse RC low CG ESC tray using stock screws. BowHouse recommends using a sewing needle or pin to line up screw holes in ESC tray and body mount(s) before starting the screws.
- You may need a short servo extension to plug lights into ESC if you are using stock headlights.
- FOR BATTERY FORWARD CONFIGURATION
- Follow the same steps to remove stock battery tray and ESC mount.
- Install hook-and-loop battery strap into BowHouse ESC mount instead of on battery tray.
- If you are using stock headlights, you will need a short servo extension cable to connect the lights to the ESC. On some models, you will also need a short servo extension cable to connect the servo to the ESC.
- Battery forward configuration may result in nearly full droop on front shocks depending on your setup.